
“SAME DAY RENTAL NOT GUARANTEED” Best to book in advance
Friday-Sunday 9:00am-5:00pm
EQUIPMENT
We are currently running with the fleet of 8 ATVs. We have 6 Honda 250 Recons.
The Recons are perfect for any level of rider from beginner to experienced.
We also have 2 Honda 250Xs that are for a more experienced rider who enjoys more speed and agility while riding the trails. We provide helmets, gloves and goggles for each rider, with a wide range of sizes to fit anyone.
HERE'S OUR FLEET

2020 Honda Recon 250
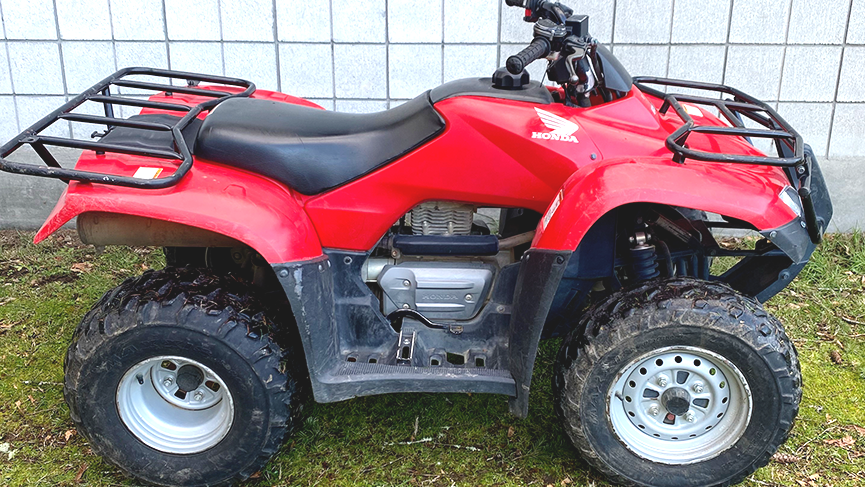
2013 Honda Recon 250
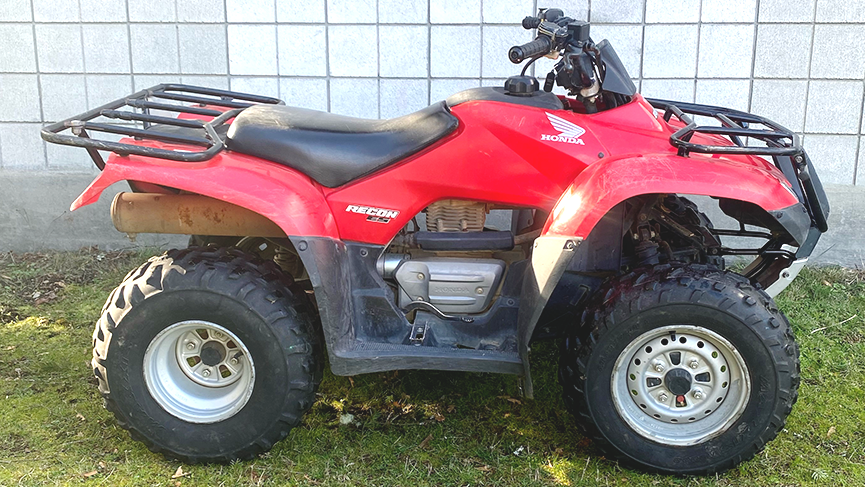
2007 Honda Recon 250
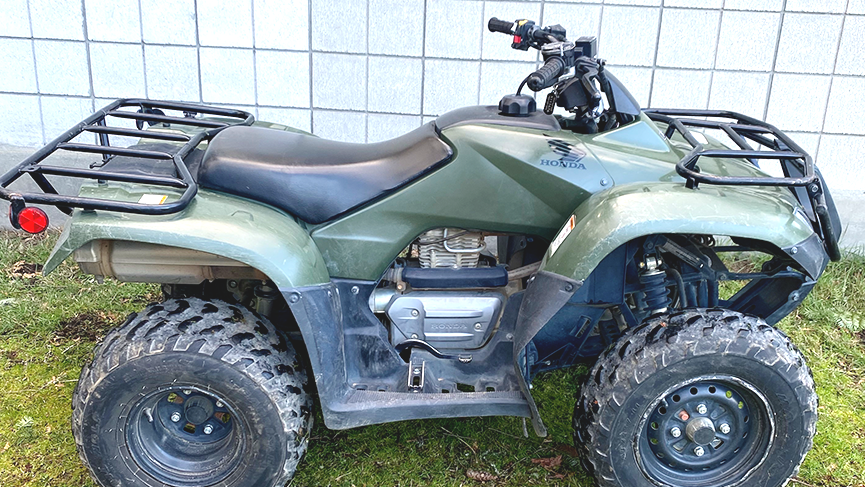
2018 Honda Recon 250
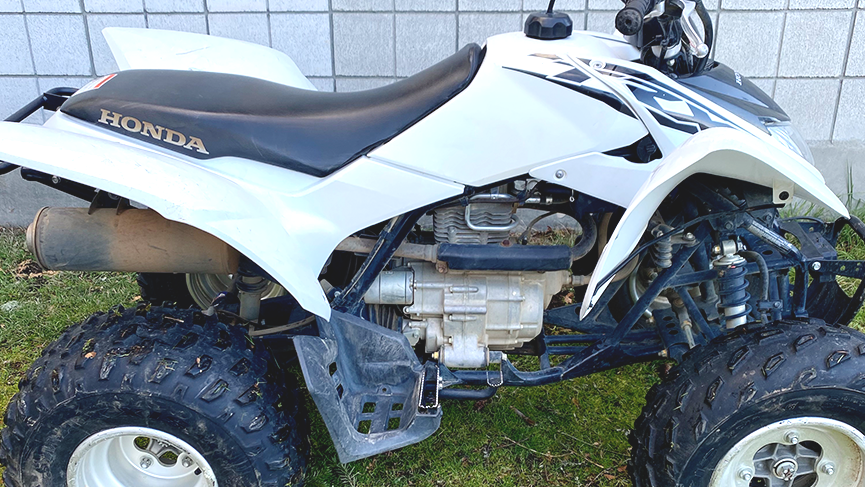
2017 Honda 250X
WE HAVE TWO TYPES OF MACHINES
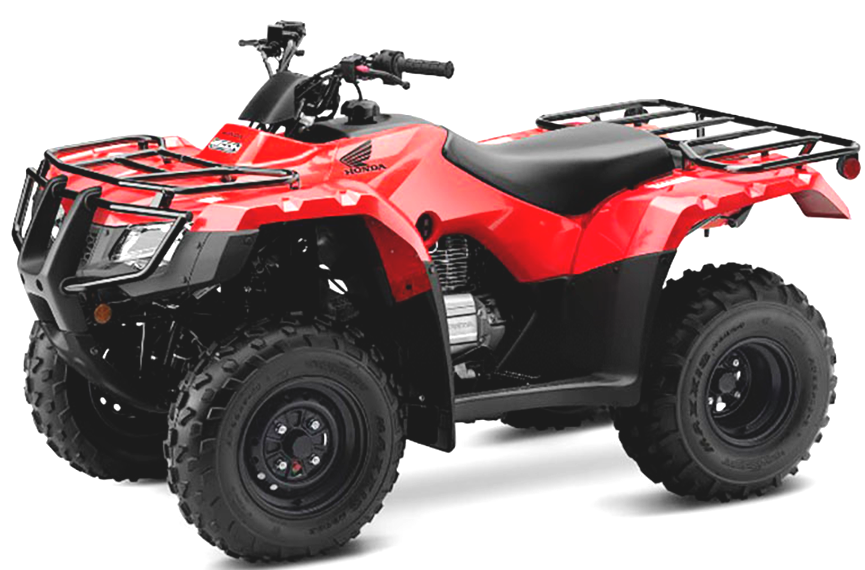
Honda Recon 250
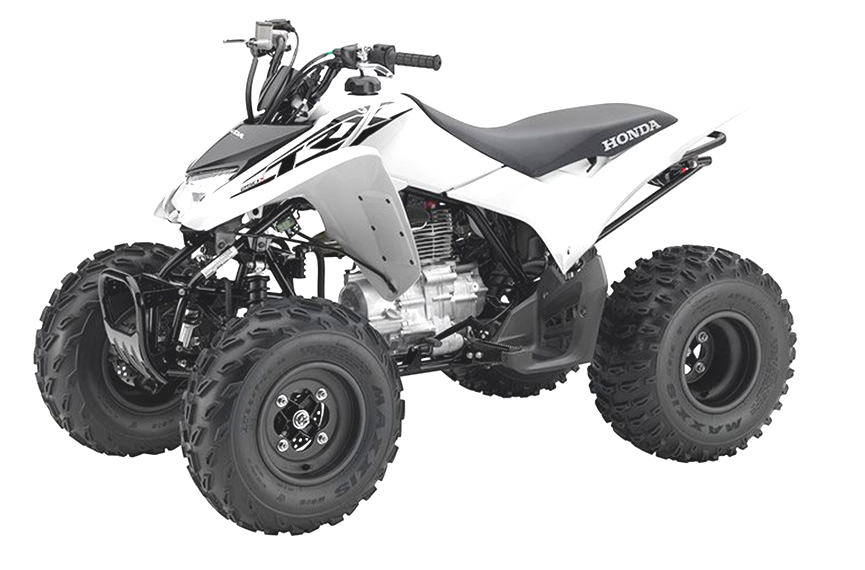
Honda 250X
HERE'S OUR FLEET


2020 Honda Recon 250
2013 Honda Recon 250
2007 Honda Recon 250


2018 Honda Recon 250
2017 Honda 250X
WE HAVE TWO TYPES OF MACHINES

Honda Recon 250

Honda 250X
RIDE BRIEF
ATV FAMILIARIZATION
Ø Parking Brake
• RECON
Squeeze brake lever with left hand to release. Pull brake lever with left hand, use right hand to push tab forward.Release brake lever while keeping pressure on tab to set.
• 250 X
Squeeze clutch lever with left hand to release. Depress pin near clutch lever and pull lever toward handlebar. Push cover over pin and release clutch lever.
Ø Brakes (Front/Rear)
• RECON
Front brake on right handlebar.
Rear brake on left handlebar and lever near right foot peg.
• 250 X
Front brake on right handlebar. Rear brake near right foot peg. Lever on left handle bar is a clutch.
Ø Shifter
(including reverse)
Shift pattern from bottom to top on all machines is RN12345.
• RECON
• Shift using left foot. Lift lever with foot to shift up, press lever down to shift down.
• To shift into reverse, pull red tab back toward rear brake lever, then pull rear brake lever with red tab toward handle bar. Downshift into reverse. To shift out of reverse, simply upshift.
• RECON ES
Use arrows on left handlebar to shift. Up arrow shifts up, down arrow shifts down. Current gear displayed.
• To shift into reverse, depress red button near rear brake lever, then pull rear brake lever with red button depressed toward handle bar. Downshift into reverse. To shift out of reverse, simply upshift.
• 250 X
Use arrows on left handlebar to shift. Up arrow shifts up, down arrow shifts down. Current gear displayed.
• To shift into reverse, depress red button near rear brake lever, then pull rear brake lever with red button depressed toward handle bar. Downshift into reverse. To shift out of reverse, simply upshift.
Ø Throttle
• Located on right handlebar,
operated with right thumb.
Ø Lights
• Located on left handlebar, yellow switch controls on/off, grey switch controls high/low beam.
Ø Ignition
(including kill switch)
• Key on/off (Should be used to turn the machine off). When on, the green (neutral) light should be on. If it is not, the machine is in gear and must be shifted down until it comes on in order to start. ***This is the most common reason for a machine not starting.***
• Kill switch located on left handlebar (Should not be used). Red slider, run is in the middle. If this is either left or right, the machine will turn over, but will not start.
• Starter located on left handlebar. Circle with a lightening bolt. Depress only long enough to start the quad.
• Using the kill switch to turn off the engine and leaving the key on will cause the battery to quickly discharge and may result in the quad not starting.
• 250 X
Use arrows on left handlebar to shift. Up arrow shifts up, down arrow shifts down. Current gear displayed.
• To shift into reverse, depress red button near rear brake lever, then pull rear brake lever with red button depressed toward handle bar. Downshift into reverse. To shift out of reverse, simply upshift.
Ø RIDING TECHNIQUE
• Braking (Level ground/hill)
• Like motorcycles, the front brakes do about 70% of the braking.
• On level ground use all brakes
(front & rear).
• Going downhill, use more of
the rear brakes.
• If you were going up hill and someone stopped in front of you and you start rolling backward, use more front brakes.
• Turning
• Turning right, lean forward and right putting body weight over
the front right tire.
• Turning left, lean forward and left putting body weight over
the front left tire.
• Transiting hills (uphill/downhill/sidehill)
• Going uphill, lean forward.
• Going downhill, lean backward.
• Transiting side hills, lean up hill.
• Dismounting/assisting the
ATV if it is unsteady.
• If the ATV is unsteady and you need to get off, do so from the uphill side. If the ATV rolls, we do not want i
t to roll over you.
• If you are attempting to steady an ATV for another rider, do so
from the uphill side.
• IF THE MACHINE DOES TIP OVER, IMMEDIATELY TURN IT OFF (KEY OR KILL SWITCH). It is actively pumping the oil out of the crankcase and causing damage to the engine.
• Throttle control
• Your hand should be completely across the hand grip and your thumb extended across the throttle. Do not use the tip of your thumb on
the tip of the throttle.
Ø Throttle
• Located on right handlebar,
operated with right thumb.
Ø Lights
• Located on left handlebar, yellow switch controls on/off, grey switch controls high/low beam.
Ø Ignition
(including kill switch)
• Key on/off (Should be used to turn the machine off). When on, the green (neutral) light should be on. If it is not, the machine is in gear and must be shifted down until it comes on in order to start. ***This is the most common reason for a machine not starting.***
• Kill switch located on left handlebar (Should not be used). Red slider, run is in the middle. If this is either left or right, the machine will turn over,
but will not start.
• Starter located on left handlebar. Circle with a lightening bolt. Depress only long enough to start the quad.
• Using the kill switch to turn off the engine and leaving the key on will cause the battery to quickly discharge and may result in the quad not starting.
• 250 X
Use arrows on left handlebar to shift. Up arrow shifts up, down arrow shifts down. Current gear displayed.
• To shift into reverse, depress red button near rear brake lever, then pull rear brake lever with red button depressed toward handle bar. Downshift into reverse. To shift out of reverse, simply upshift.
Ø TRAIL ETTIQUETTE
• Multi-use trails, share the trails.
• Trails are able to be used by hikers, people on horseback, etc. be respectful of any one using the park.
• ATV allowed trails, stay off the single-track trails.
• ATV trails are marked in yellow on the map and indicated by yellow diamonds on the trails.
• Stay off the single-track
(motorcycle) trails.
• Do not ride off trail or
make new trails.
• There are about 60 miles of trail accessible to ATVs no reason to be making any new ones.
• Trails are the width of a quad, but two directional.
• 90% of the accidents on the trails are head-on collisions.
• The other 10% are people being
rear-ended when someone stops quickly in front of them.
• Both cases speed is the
contributing factor.
• Meeting other riders on the trail.
• When you meet riders on the trail, hold up fingers to indicate how many riders are behind you. Total riders minus one for the leader. Each rider holds up the number of riders behind them. The last rider holds up a closed fist indicating they are the last
rider in the group.
• Motorcycles will ride
faster than ATVs
• When you meet riders on the trail, hold up fingers to indicate how many riders are behind you. Total riders minus one for the leader. Each rider holds up the number of riders behind them. The last rider holds up a closed fist indicating they are the last
rider in the group.
• Leave no trace!
• Ensure you bring everything you take on the trail back with you. You are welcome to throw any trash you have in the garbage bag in the back of the trailer.
Ø PRECAUTIONS
• Do not ride faster than your experience level.
• Do not operate the ATV on roadways.
• There have been 18 fatalities within the park. 16 of the 18 happened on the roads. The ATVs are not plated or designed for road use. There are places where the trail crosses the road.
Stop look both ways and when
safe to do so cross the road.
Do NOT transit the roads.
• Do not speed through water.
• Objects not visible under the water may cause damage to the ATV.
• Do not transit water deeper
than the foot pegs.
• Manufacturer states no deeper or engine may ingest water causing internal damage.
Ø EMERGENCIES
• Call 911 even if no cell service.
• Your always within about ½
mile of a road.
• Notify me as soon as possible if something happens.
RIDE BRIEF
ATV FAMILIARIZATION
Ø Parking Brake
• RECON
Squeeze brake lever with left hand to release.
Pull brake lever with left hand, use right hand to push tab forward.Release brake lever while keeping pressure on tab to set.
• 250 X
Squeeze clutch lever with left hand to release.
Depress pin near clutch lever and pull lever toward handlebar. Push cover over pin and release clutch lever.
Ø Brakes (Front/Rear)
• RECON
Front brake on right handlebar. Rear brake on left handlebar and lever near right foot peg.
• 250 X
Front brake on right handlebar. Rear brake near right foot peg. Lever on left handle bar is a clutch.
Ø Shifter (including reverse)
Shift pattern from bottom to top on all machines is RN12345.
• RECON
• Shift using left foot. Lift lever with foot to shift up, press lever down to shift down.
• To shift into reverse, pull red tab back toward rear brake lever, then pull rear brake lever with red tab toward handle bar. Downshift into reverse. To shift out of reverse, simply upshift.
• RECON ES
Use arrows on left handlebar to shift. Up arrow shifts up, down arrow shifts down. Current gear displayed.
• To shift into reverse, depress red button near rear brake lever, then pull rear brake lever with red button depressed toward handle bar. Downshift into reverse. To shift out of reverse, simply upshift.
• 250 X
Use arrows on left handlebar to shift. Up arrow shifts up, down arrow shifts down. Current gear displayed.
• To shift into reverse, depress red button near rear brake lever, then pull rear brake lever with red button depressed toward handle bar. Downshift into reverse. To shift out of reverse, simply upshift.
Ø Throttle
• Located on right handlebar, operated with right thumb.
Ø Lights
• Located on left handlebar, yellow switch controls on/off, grey switch controls high/low beam.
Ø Ignition (including kill switch)
• Key on/off (Should be used to turn the machine off). When on, the green (neutral) light should be on. If it is not, the machine is in gear and must be shifted down until it comes on in order to start. ***This is the most common reason for a machine not starting.***
• Kill switch located on left handlebar (Should not be used). Red slider, run is in the middle. If this is either left or right, the machine will turn over, but will not start.
• Starter located on left handlebar. Circle with a lightening bolt. Depress only long enough to start the quad.
• Using the kill switch to turn off the engine and leaving the key on will cause the battery to quickly discharge and may result in the quad not starting.
• 250 X
Use arrows on left handlebar to shift. Up arrow shifts up, down arrow shifts down. Current gear displayed.
• To shift into reverse, depress red button near rear brake lever, then pull rear brake lever with red button depressed toward handle bar. Downshift into reverse. To shift out of reverse, simply upshift.
Ø RIDING TECHNIQUE
• Braking (Level ground/hill)
• Like motorcycles, the front brakes do about 70% of the braking.
• On level ground use all brakes (front & rear).
• Going downhill, use more of the rear brakes.
• If you were going up hill and someone stopped in front of you and you start rolling backward, use more front brakes.
• Turning
• Turning right, lean forward and right putting body weight over the front right tire.
• Turning left, lean forward and left putting body weight over the front left tire.
• Transiting hills (uphill/downhill/sidehill)
• Going uphill, lean forward.
• Going downhill, lean backward.
• Transiting side hills, lean up hill.
• Dismounting/assisting the ATV if it is unsteady.
• If the ATV is unsteady and you need to get off, do so from the uphill side. If the ATV rolls, we do not want it to roll over you.
• If you are attempting to steady an ATV for another rider, do so from the uphill side.
• IF THE MACHINE DOES TIP OVER, IMMEDIATELY TURN IT OFF (KEY OR KILL SWITCH). It is actively pumping the oil out of the crankcase and causing damage to the engine.
• Throttle control
• Your hand should be completely across the hand grip and your thumb extended across the throttle. Do not use the tip of your thumb on the tip of the throttle.
Ø Throttle
• Located on right handlebar, operated with right thumb.
Ø Lights
• Located on left handlebar, yellow switch controls on/off, grey switch controls high/low beam.
Ø Ignition (including kill switch)
• Key on/off (Should be used to turn the machine off). When on, the green (neutral) light should be on. If it is not, the machine is in gear and must be shifted down until it comes on in order to start. ***This is the most common reason for a machine not starting.***
• Kill switch located on left handlebar (Should not be used). Red slider, run is in the middle. If this is either left or right, the machine will turn over, but will not start.
• Starter located on left handlebar. Circle with a lightening bolt. Depress only long enough to start the quad.
• Using the kill switch to turn off the engine and leaving the key on will cause the battery to quickly discharge and may result in the quad not starting.
• 250 X
Use arrows on left handlebar to shift. Up arrow shifts up, down arrow shifts down. Current gear displayed.
• To shift into reverse, depress red button near rear brake lever, then pull rear brake lever with red button depressed toward handle bar. Downshift into reverse. To shift out of reverse, simply upshift.
Ø TRAIL ETTIQUETTE
• Multi-use trails, share the trails.
• Trails are able to be used by hikers, people on horseback, etc. be respectful of any one using the park.
• ATV allowed trails, stay off the single-track trails.
• ATV trails are marked in yellow on the map and indicated by yellow diamonds on the trails.
• Stay off the single-track (motorcycle) trails.
• Do not ride off trail or make new trails.
• There are about 60 miles of trail accessible to ATVs no reason to be making any new ones.
• Trails are the width of a quad, but two directional.
• 90% of the accidents on the trails are head-on collisions.
• The other 10% are people being rear-ended when someone stops quickly in front of them.
• Both cases speed is the contributing factor.
• Meeting other riders on the trail.
• When you meet riders on the trail, hold up fingers to indicate how many riders are behind you. Total riders minus one for the leader. Each rider holds up the number of riders behind them. The last rider holds up a closed fist indicating they are the last rider in the group.
• Motorcycles will ride faster than ATVs
• When you meet riders on the trail, hold up fingers to indicate how many riders are behind you. Total riders minus one for the leader. Each rider holds up the number of riders behind them. The last rider holds up a closed fist indicating they are the last rider in the group.
• Leave no trace!
• Ensure you bring everything you take on the trail back with you. You are welcome to throw any trash you have in the garbage bag in the back of the trailer.
Ø PRECAUTIONS
• Do not ride faster than your experience level.
• Do not operate the ATV on roadways.
• There have been 18 fatalities within the park. 16 of the 18 happened on the roads. The ATVs are not plated or designed for road use. There are places where the trail crosses the road. Stop look both ways and when safe to do so cross the road. Do NOT transit the roads.
• Do not speed through water.
• Objects not visible under the water may cause damage to the ATV.
• Do not transit water deeper than the foot pegs.
• Manufacturer states no deeper or engine may ingest water causing internal damage.
Ø EMERGENCIES
• Call 911 even if no cell service.
• Your always within about ½ mile of a road.
• Notify me as soon as possible if something happens.
